
Digital illustration is one of the most exciting and fast-growing fields in modern art. It blends creativity, technology, and design, allowing artists to bring imaginative concepts to life using digital tools instead of traditional materials. Whether you’re creating a children’s book, designing characters for a video game, or developing brand artwork, digital illustration plays a vital role in how we experience visual media today.
This guide will help you understand what digital illustration is, how it works, the tools professionals use, and how you can start creating your own artwork.
What Is Digital Illustration?

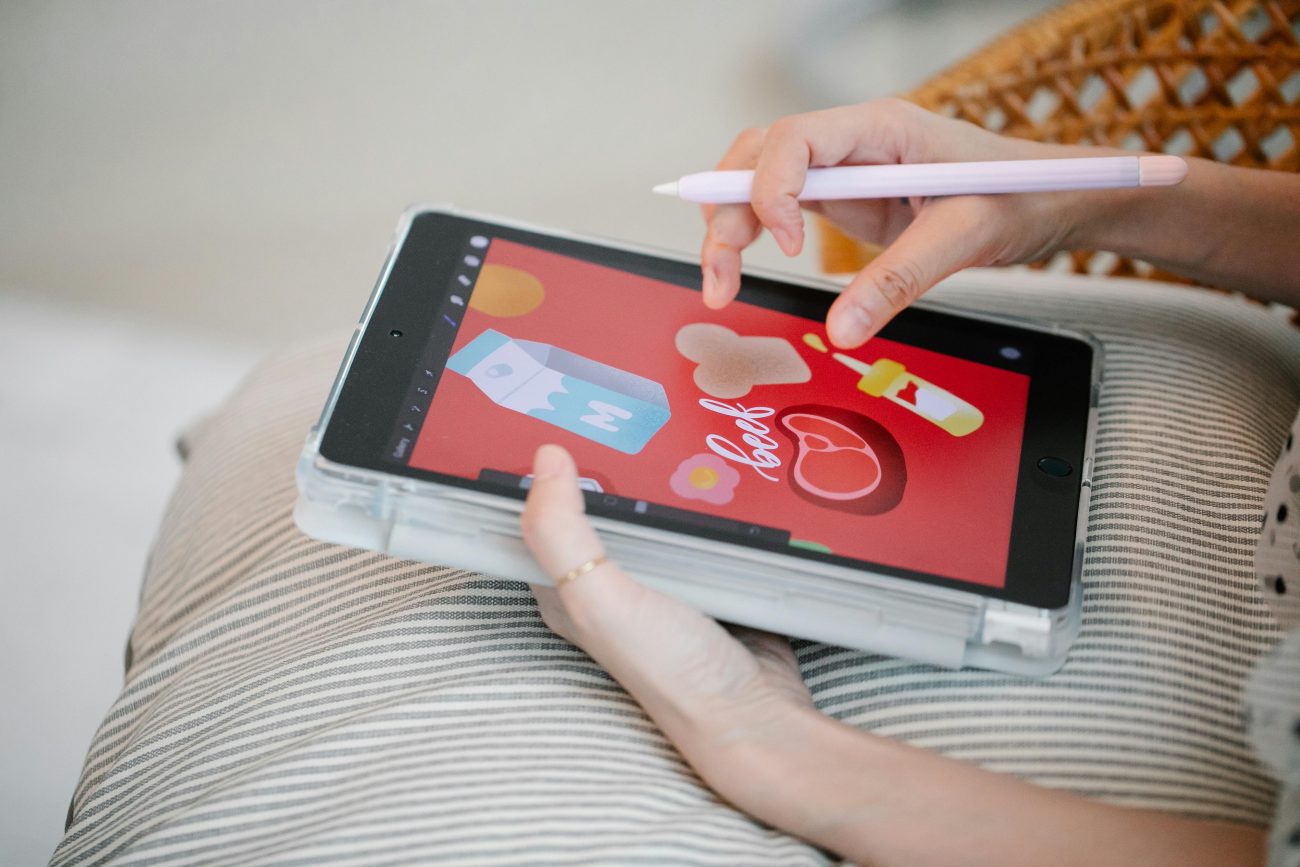
Digital illustration is the process of creating artwork using digital tools such as drawing tablets, styluses, and computer software. Unlike traditional illustration, which relies on paint, pencils, or ink, digital artists work with programs like Adobe Photoshop, Procreate, or Clip Studio Paint to draw, color, and refine their art.
At its core, digital illustration combines the creativity of traditional art with the precision and flexibility of technology. Artists can work faster, make easy edits, and experiment with textures, colors, and layers without worrying about running out of materials.
Key Features of Digital Illustration
- Created on digital devices using software and drawing tablets
- Layer-based editing allows for easy adjustments and experimentation
- Infinite color options and digital brushes mimic real-world textures
- Scalable formats ensure artwork stays high-quality for web or print
The Evolution of Digital Illustration
Digital illustration didn’t appear overnight—it evolved alongside technology. Early versions began in the 1980s, when computers became more capable of handling graphics. Programs like MacPaint introduced basic digital drawing tools, but the field exploded in the 1990s and 2000s as hardware and software improved.
Today, digital illustration is used in nearly every creative industry, including entertainment, education, marketing, and product design. Artists now have access to cloud-based platforms, AI-powered tools, and stylus-sensitive tablets that replicate the feel of real drawing.
How Digital Illustration Has Changed Art
- Accessibility: Anyone can start illustrating with affordable tools and free apps.
- Collaboration: Artists can share files, layers, and designs instantly across the world.
- Experimentation: Unlimited undo options and digital brushes encourage creative freedom.
- Integration: Illustrations easily fit into web design, animation, and digital publishing.
Different Types of Digital Illustration
Not all digital illustrations are the same. Artists can specialize in a range of styles and industries depending on their interests and skill sets. Here are the most common types:
- Character Illustration
Used in comics, video games, and animation, character illustration focuses on designing personalities through poses, expressions, and costume details.
- Concept Art
Concept artists develop early visual ideas for movies, games, and advertising. They create environments, props, and characters to help shape the final product’s look.
- Editorial Illustration
Editorial illustrations accompany articles or blogs, adding visual interest and helping readers connect with complex ideas.
- Fashion Illustration
Artists use digital illustration to sketch clothing designs and textures, helping brands and designers visualize their collections.
- Technical Illustration
These are precise and informative drawings used in manuals, engineering guides, and product design documents.
- Children’s Book Illustration
Digital illustrators bring stories to life with colorful, expressive artwork that captures young readers’ imaginations.
Tools & Software Used in Digital Illustration

Modern illustrators have access to a wide range of tools that make creating digital art easier and more efficient.
Hardware Essentials
- Drawing Tablet: Wacom, Huion, and XP-Pen tablets allow pressure-sensitive drawing.
- iPad or Tablet: Perfect for mobile drawing with apps like Procreate.
- Stylus: Mimics the feel of traditional drawing tools.
- Computer or Laptop: Needed for professional-level software and large files.
Popular Software for Digital Artists
- Adobe Photoshop: Industry standard for painting, retouching, and layering.
- Procreate: iPad-exclusive app loved for its intuitive interface.
- Clip Studio Paint: Great for comics and animation.
- Corel Painter: Mimics traditional brushes and paint textures.
- Affinity Designer: Vector-based tool for crisp, scalable illustrations.
Key Advantages of Digital Tools
- Undo and redo features make experimentation easy.
- Layers let artists separate sketches, colors, and details.
- Digital brushes offer endless variety in textures and strokes.
- Files can be easily shared, printed, or resized for multiple uses.
The Process of Creating a Digital Illustration
Creating a digital illustration is a structured yet creative process that combines planning, technique, and imagination. Whether the goal is to design a character, a concept piece, or a detailed scene, every digital artwork follows a series of key steps—from brainstorming to final export. Each stage plays a crucial role in ensuring the finished piece is both visually appealing and technically polished.
- Brainstorming & Concept Development
Every great illustration begins with an idea. Artists start by identifying the goal of the project—whether it’s to tell a story, design a product, or capture an emotion. During this stage, they gather inspiration from various sources such as photographs, online references, or real-life observations.
Many illustrators create mood boards or concept sheets to organize their ideas. These visuals help establish the color palette, theme, and general tone of the artwork.
Tips for Better Brainstorming:
- Use visual inspiration platforms like Pinterest or Behance.
- Jot down words that describe the emotion or story you want to convey.
- Collect references of poses, lighting, and compositions.
- Create quick thumbnail sketches to explore different ideas.
This step sets the creative foundation, ensuring the artwork has clear direction and purpose before moving forward.
- Sketching
After brainstorming, the next step is sketching. Using a stylus and tablet, the artist begins to draw rough outlines to establish the main composition, shapes, and proportions. The goal here is not to achieve perfection but to lay down the structure of the illustration.
Artists often work in grayscale or use light opacity to keep the sketch flexible for revisions. At this point, they decide on the placement of characters, background elements, and the overall flow of the image.
Key Points in the Sketching Stage:
- Focus on composition and balance, not detail.
- Use multiple layers to separate foreground and background elements.
- Experiment with scale and perspective for a dynamic layout.
- Keep your sketches loose and open to change.
The sketching stage acts as the blueprint of your digital illustration—everything that follows builds upon it.
- Line Art
Once the sketch feels right, artists move on to line art. This step involves creating clean, defined outlines that will guide the coloring and shading process later.
Line art helps establish the structure of the artwork and gives it a polished, cohesive look. Artists typically use pressure-sensitive brushes that allow variation in line thickness, adding movement and personality to the piece.
Tips for Clean Line Art:
- Use a smooth, high-resolution canvas for crisp lines.
- Adjust brush settings for consistent stroke weight.
- Zoom in for precision, but zoom out often to check overall balance.
- Lock or hide the sketch layer to avoid distractions.
Good line art not only enhances readability but also sets the tone—whether you’re aiming for a soft, painterly look or a sharp, comic-style finish.
- Coloring & Shading
Coloring transforms a simple line drawing into a vibrant, dynamic image. Artists typically start by applying flat colors to separate areas—like skin, clothing, or background—on individual layers. This makes it easier to modify or recolor specific parts later.
Once the base colors are in place, shading and lighting bring the illustration to life. Techniques like gradient blending, soft shading, or cell shading are used to add dimension and realism. Artists also play with light sources, shadows, and reflections to create depth and atmosphere.
Best Practices for Coloring & Shading:
- Use separate layers for highlights, shadows, and effects.
- Experiment with layer modes (Multiply, Overlay, Soft Light) for realistic lighting.
- Stick to a consistent light source to maintain visual coherence.
- Balance warm and cool tones for natural contrast.
This stage often takes the most time, but it’s also where creativity shines. With digital tools, artists can easily test color schemes and refine their work until it feels just right.
- Final Touches
Once the main illustration is complete, artists move on to the finishing phase. This step focuses on refining details and enhancing the overall look of the piece.
Final touches may include:
- Adding highlights and reflections to bring more depth.
- Adjusting brightness, contrast, or saturation for visual balance.
- Applying filters or textures to give the artwork a unique mood or style.
- Cleaning up edges and removing any rough marks or inconsistencies.
Some illustrators also use post-processing effects like glows, blurs, or lighting overlays to make their artwork pop. At this point, feedback from peers or clients can be valuable for catching small improvements before final export.
Quick Tip: Always view your illustration at 100% zoom and on different screens (like a tablet or phone) to ensure it looks great everywhere.
- Exporting & Sharing
The final step is exporting the completed digital illustration. Choosing the right file format is essential, as it affects image quality and usability.
Common Export Formats:
- JPEG: Great for web use, social media, or general sharing.
- PNG: Keeps transparency and high-quality color—ideal for logos or layered work.
- TIFF: Used for professional printing due to lossless quality.
- SVG or EPS: Vector formats best suited for scalable design work.
Before exporting, artists check the resolution (typically 300 DPI for print and 72 DPI for web) and color mode (CMYK for print, RGB for screen). They may also save layered project files (like .PSD or .CSP) in case future edits are needed.
Once exported, artists can showcase their work online, add it to portfolios, or deliver it to clients for final use in marketing materials, websites, or digital products.
The Role of Digital Illustration in Modern Media
Digital illustration plays a major role in today’s visual culture. It’s used everywhere—from online advertising to film production.
Where You’ll See Digital Illustrations
- Marketing & Branding: Logos, ads, and promotional materials
- Social Media: Eye-catching content and infographics
- Entertainment: Animation, movies, and game art
- Education: E-learning visuals and diagrams
- Publishing: Book covers and magazine artwork
Illustrations make complex ideas easier to understand and more engaging. They can communicate emotions, highlight product features, or tell a story visually—something that simple text can’t always achieve.
Benefits of Digital Illustration
Digital illustration offers unique advantages that make it appealing for both professionals and beginners.
Creative Benefits
- Freedom to experiment with styles and effects
- Ability to undo mistakes instantly
- Wide range of digital brushes and textures
- Easier to combine art with photography or design
Practical Benefits
- No need for physical materials like paint or canvas
- Easy storage and editing of projects
- Compatible with other digital media like video and animation
- Fast delivery for clients or online publishing
Challenges of Digital Illustration
While digital illustration offers incredible flexibility, it also has its challenges.
Common Struggles for Artists
- Creative burnout: Constant digital work can drain inspiration.
- Over-editing: Easy access to tools can lead to perfectionism.
- Learning curve: Understanding software and devices takes time.
- Screen fatigue: Long hours in front of a computer can strain the eyes.
Tips to Overcome These Challenges
- Take regular breaks to rest your eyes and mind.
- Learn shortcuts and techniques gradually.
- Join online communities for feedback and motivation.
- Experiment with both digital and traditional mediums for balance.
How to Get Started with Digital Illustration
Starting your digital illustration journey doesn’t require expensive gear or formal training—just creativity and patience.
Beginner Tips
- Start simple: Use free software like Krita or Autodesk SketchBook.
- Learn the basics: Study line, color, and composition.
- Watch tutorials: YouTube and online art courses can speed up learning.
- Practice daily: Consistent sketching improves skill and confidence.
- Find your style: Explore different art forms until you discover your own unique expression.
The Future of Digital Illustration
The future of digital illustration is bright, thanks to advancements in AI tools, virtual reality, and 3D modeling. Artists now use digital brushes that respond to pressure and tilt like real pencils, and some tools even predict brush strokes or color choices.
With more industries relying on visual communication, the demand for skilled illustrators continues to grow. From NFTs and web comics to digital marketing, new opportunities are opening every day for artists who can blend creativity with technology.
Final Thoughts
Digital illustration is more than just art on a screen—it’s a powerful form of modern storytelling. It bridges creativity and technology, offering endless ways to express ideas visually. Whether you’re a beginner exploring your first tablet or a professional looking to refine your skills, digital illustration opens the door to a world of artistic innovation.
By understanding its tools, techniques, and creative process, you can transform your imagination into stunning visuals that inspire and connect with audiences everywhere.